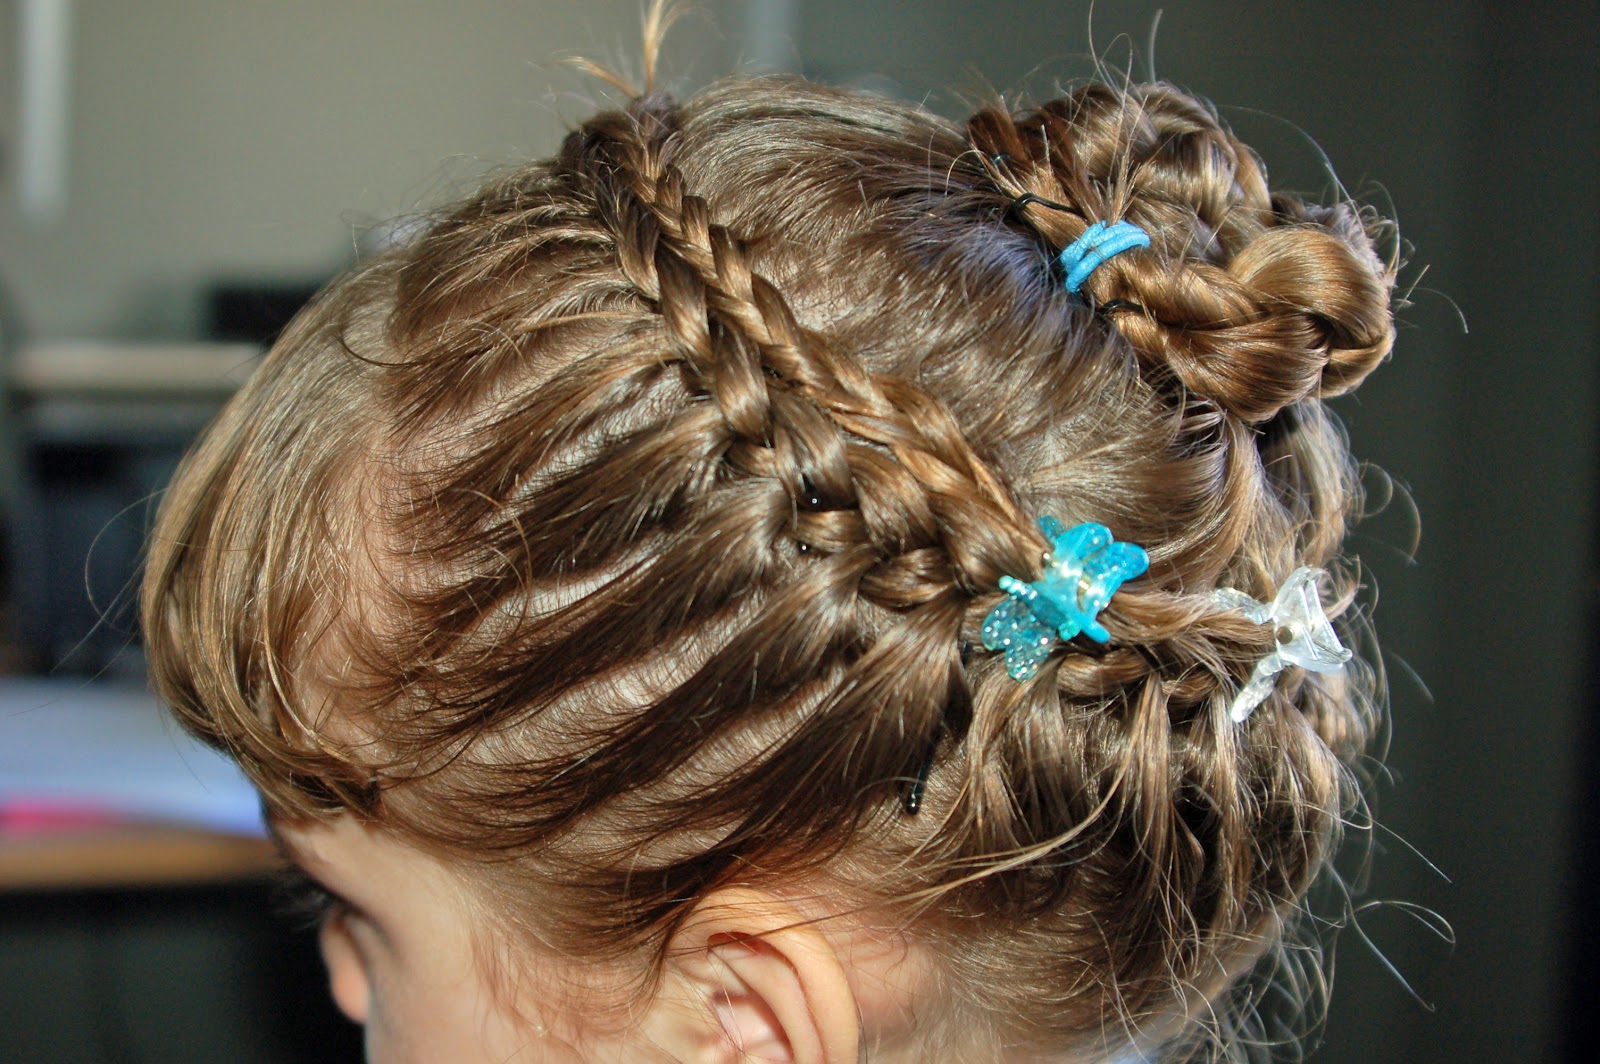
My youngest child is 4 and she is my only girl. Yes she is very, very spoiled...but that's another story. I've never been much of a girlie girl. I was a tomboy as I grew up and kind of stayed that way, with 4 boys I kind of had to be. When I had my daughter it all changed. I'm forever buying dresses, I learned how to make hair accessories, I actually tolerate shopping now, and I'm always on the look out for a good hairstyle for my daughter.
We were doing our normal french braid down the side when my daughter said she wanted it to circle her head. At 4 she is very decisive and won't hesitate to tell you what she wants, or what you want ; ) I remember seeing a similar type of hairstyle on yes Pinterest. I gave it a go from memory.
I basically french braided it all around her head. Then I made a normal braid in the middle and made it into a bun. It's a little messy as it is quite difficult to get a 4 year old to sit for very long and her hair isn't even everywhere yet. She has a lot of baby hair still.. After seeing her in that style all day I decided I wouldn't do it again. A little too mature for a 4 year old I think, but it turned out ok though. What do you think?
Monday, August 20, 2012
Monday, August 13, 2012
Halloween Decorations
In my attempt to avoid cleaning house : ) I've seemed to find more time to craft. And with my addiction to Pinterest I have found the coolest things.
Now I've seen light bulb crafts all over Pinterest and we have a huge collection of blown out light bulbs since we have no idea where to recycle those in Chula Vista. So if you know where please share : ) The problem is we don't have the normal size light bulbs. We have flood bulbs, which are kind of shaped like a beaker. Not very many crafts out there for those, at least that I can find...again sharing is always welcomed. I did manage to find this cool Halloween decoration though. http://www.oureverydayearth.com/creative-homemade-halloween-potions/ I made just a couple of changes to them. I spray painted some of the bulbs, and instead of printing on them, I cut out vinyl on the Cricut...I love using vinyl! I really like the way they turned out. My son helped me come up with some names and of course loving Harry Potter the way I do I had to use some of his potions : )
Here they are. (I'm still working on the art of product photography.)
Now I've seen light bulb crafts all over Pinterest and we have a huge collection of blown out light bulbs since we have no idea where to recycle those in Chula Vista. So if you know where please share : ) The problem is we don't have the normal size light bulbs. We have flood bulbs, which are kind of shaped like a beaker. Not very many crafts out there for those, at least that I can find...again sharing is always welcomed. I did manage to find this cool Halloween decoration though. http://www.oureverydayearth.com/creative-homemade-halloween-potions/ I made just a couple of changes to them. I spray painted some of the bulbs, and instead of printing on them, I cut out vinyl on the Cricut...I love using vinyl! I really like the way they turned out. My son helped me come up with some names and of course loving Harry Potter the way I do I had to use some of his potions : )
Here they are. (I'm still working on the art of product photography.)
Saturday, August 11, 2012
Coasters
Yes I am a procrastinator! I do everything the last minute and may even be late often. I have been since college...writing my papers the morning they are due : ) With this in mind, as I prepared to go to Bunco yesterday I realized it was not only my birthday month but one of the other ladies birthday month as well. As she and I are the youngest on the Bunco Babes (average age is 50 something...that's being kind, lol...and I'm 42 and she's 32) we have what I like to think of as a bond. I didn't want to show up empty handed, so there was a craft that I've been dying to try. I even had all the supplies to make them...tile coasters.
She is a huge Disney fan. Visits Disneyland practically every week, so I dipped into my Disney scrapbook paper and made these coasters.
They are all over Pinterest, but I chose this site to work from http://blog.hwtm.com/2010/07/diy-tutorial-mod-podge-tile-coasters/ . Their tutorial was really easy, glossy white tiles from Home Depot, cut the paper to size, apply paper with mod podge, a layer of mod podge over the paper, finished it with lacquer, then felt on the bottom. I managed to do them in 30 minutes.
I really liked them and someone in the family is going to get some coasters for Christmas : )
Here are some closer shots of the coasters.
(I should have centered this last one, oh well, next time.)
She is a huge Disney fan. Visits Disneyland practically every week, so I dipped into my Disney scrapbook paper and made these coasters.
They are all over Pinterest, but I chose this site to work from http://blog.hwtm.com/2010/07/diy-tutorial-mod-podge-tile-coasters/ . Their tutorial was really easy, glossy white tiles from Home Depot, cut the paper to size, apply paper with mod podge, a layer of mod podge over the paper, finished it with lacquer, then felt on the bottom. I managed to do them in 30 minutes.
I really liked them and someone in the family is going to get some coasters for Christmas : )
Here are some closer shots of the coasters.
(I should have centered this last one, oh well, next time.)
Subscribe to:
Posts (Atom)